Pages

Showing posts with label Tutorials. Show all posts

Friday, February 5, 2016

Quilted Skillet Holder Tutorial


I just got a new (HUGE) cast-iron skillet for Christmas and I can't wait to use it! I've been wanting something big so I can double my dinner recipes and freeze/save them for later.

(Before I move on to the tutorial, here is my heart-felt plea for any tips regarding seasoning a cast-iron and/or awesome freezer-friendly dinner recipes!!)

My other cast-iron skillet came with an awesome handle holder, which sadly got singed one day when it got too close to the fire (oops).


One lazy Sunday, I came up with this fun little project. It's a great way to use up your scraps! It's about a 45-60 minute project (or faster if you are more experienced!) and would make a great house-warming gift or hostess gift.

My #1 tip today would be to use fabric scraps you actually love. This is an item that will be used/seen every day, so make it out of something that will make you smile!

I used a double layer of batting for each side. You may also use insulated batting for extra protection. Remember to always be cautious with hot pans!!

Here's what you'll need:
- Sewing machine, thread, needle (I used size 75/11)
- a walking foot is recommended for sewing through thick layers
- 1 piece of paper/cardboard cut 3" x 6" and rounded at the top
- 2 scraps of fabric cut 3" x 6"
- 4 pieces of batting cut 4" x 7" OR 2 pieces of insulated batting cut 4" x 7"
- 1 piece of fabric (binding) cut 2.5" x 8"


Cut your fabric and batting up to the measurements specified above. Iron binding fabric in half lengthwise.

Use the paper pattern you created to guide you as you round off the tops of your 3" x 6" fabric rectangles.


Place fabric rectangles on top of 2 layers of batting (OR a layer of insulated batting) and baste (connect the layers together) using 3 safety pins for each side.

Quilt (sew through the layers) as desired. Trim batting.


Place right sides together and sew down one side using a 1/4" seam allowance. Press seams open.


Pin your binding fabric with the raw edges together and sew using a 1/4" seam allowance.


Next, flip the binding fabric so it is laying on the right side of the skillet holder and sew it down (try to sew as close to the edge as possible for a nice clean look).


Fold it in half (right sides together) and continue sewing around the edge with a 1/4" seam allowance.


Back-stitch (stitch backwards and forwards) a few times to secure it.

Trim the ends of your binding and flip it right side out!


This would make a lovely hostess or house-warming gift!


Enjoy! 


Friday, January 8, 2016

"The Anything Zipper Pouch" Tutorial


You can never have too many zipper pouches!


The possibilities are literally endless when it comes to filling up a zipper pouch. Let's brainstorm some fun uses:

- makeup bag for your purse
- eco-friendly reusable (washable!) snack bag
- crayon, pencil, marker holder
- travel bag for game pieces or card games
- diaper/wipes case
- cord keeper for traveling
- so much more!!

I bet you could name at least five more ways you would use one! You can take anything with you!

These make great gifts! You can give as is or stick some candies inside for a sweet surprise.

Zipper pouches are one of my favorite things to sew! There are several great tutorials out there, but I first learned from Dana from MADE Everyday. You can find her tutorial by clicking here, or you can read on!

You may use any zipper you'd like, but if you think you're going to make several of them, I would look into buying in bulk instead of individually (wayyy cheaper). I found a great seller on Etsy who sells wholesale YKK zippers at a good price HERE. There are so many different kinds and colors, so pick what works for you!

Here's what you'll need (for my tutorial, I'll give the measurements I used):


- An 8" zipper (Hint: The hanging tag things at the end will make it 1.5" inches longer total.)

- Two pieces of fabric for the lining, cut 9.5" by 6.5" (See how I added 1.5"? Of course you did, smarty)
- Two pieces of fabric for the outside, cut 9.5" by 6.5"


Here's how to make it:

Open zipper a few inches and line it up with the top of one of the lining pieces (right side facing up if there is a pattern)


Place your outside fabric face down on top and make a zipper sandwich.


Pin the three layers together.


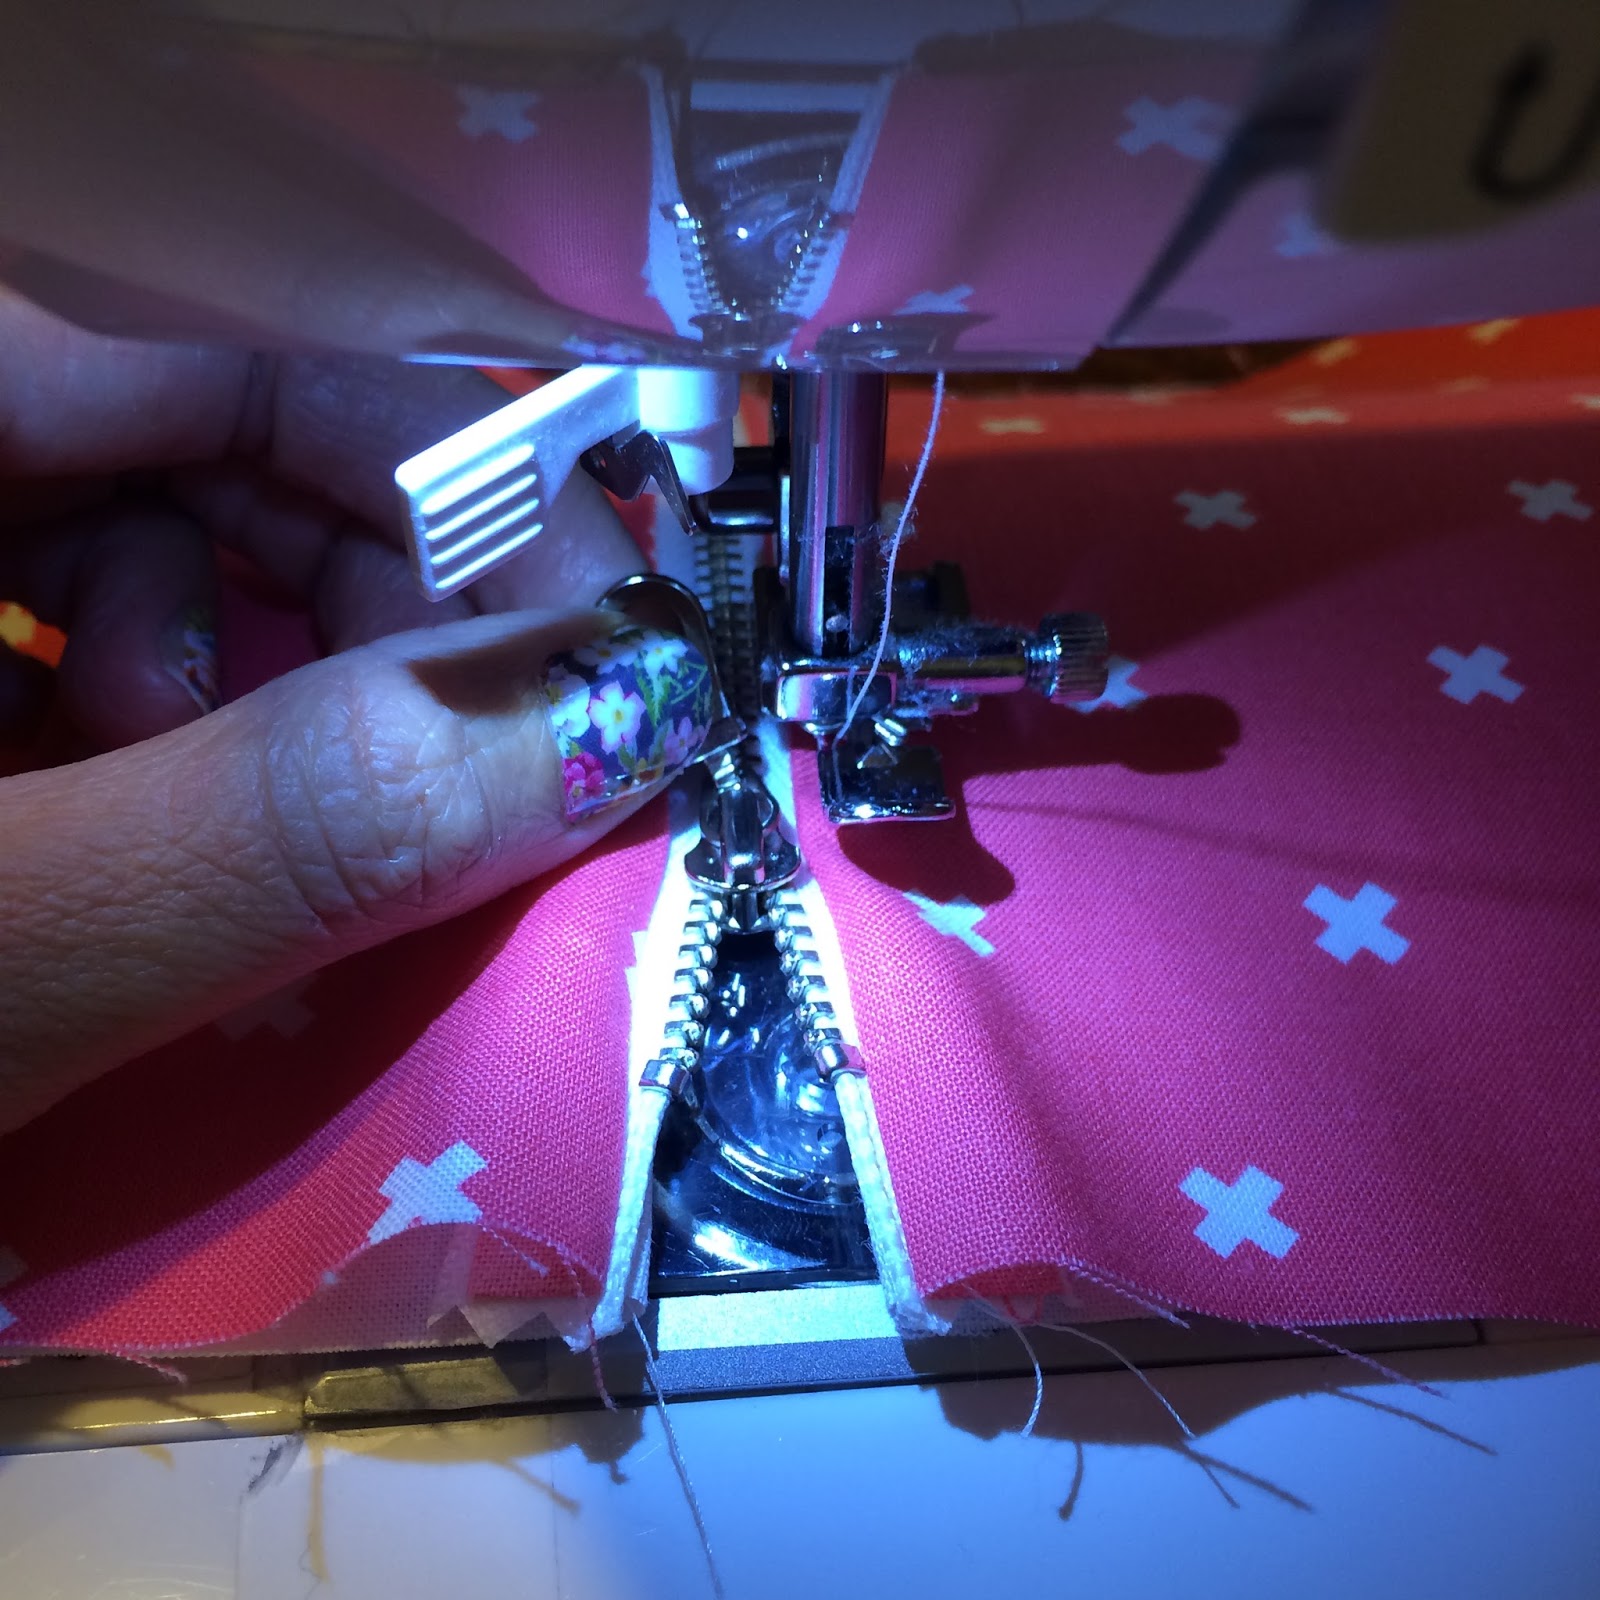
Bring it to the machine and sew as close to the zipper as you'd like. Make sure you use a zipper foot! I also like to engage the needle down position while sewing, but it isn't necessary.


When you get to the zipper head, stop sewing. Lift presser foot and close zipper. (You may also need to bring the needle up to get the zipper to close.) Continue sewing to the edge.


Next, fold back the outer & inner layers to expose zipper. Lay the zipper on top of the other inside lining piece of fabric (just like you did with the first one -- only this time the zipper is facing the other direction and you don't need to open it).


Lay the other outer piece on top to make another zipper sandwich!


Pin the three layers together.


Sew the three layers together just like you did for the other side. 


When you get close to the zipper head, don't forget to stop sewing, lift the presser foot (and possibly the needle), open the zipper, then lower presser foot and continue sewing to the end.

Now your zipper pouch will look like this:


Next, you will need to iron it out to make it crisp and ready for topstitching. Be extra careful if you are using a metal zipper! It will get hot!


Ready to topstitch? You will be sewing through all three layers again.


I like to keep it about 1/8" from the edge.


Once again, you'll have to stop to lift the presser foot and open the zipper to get around it.


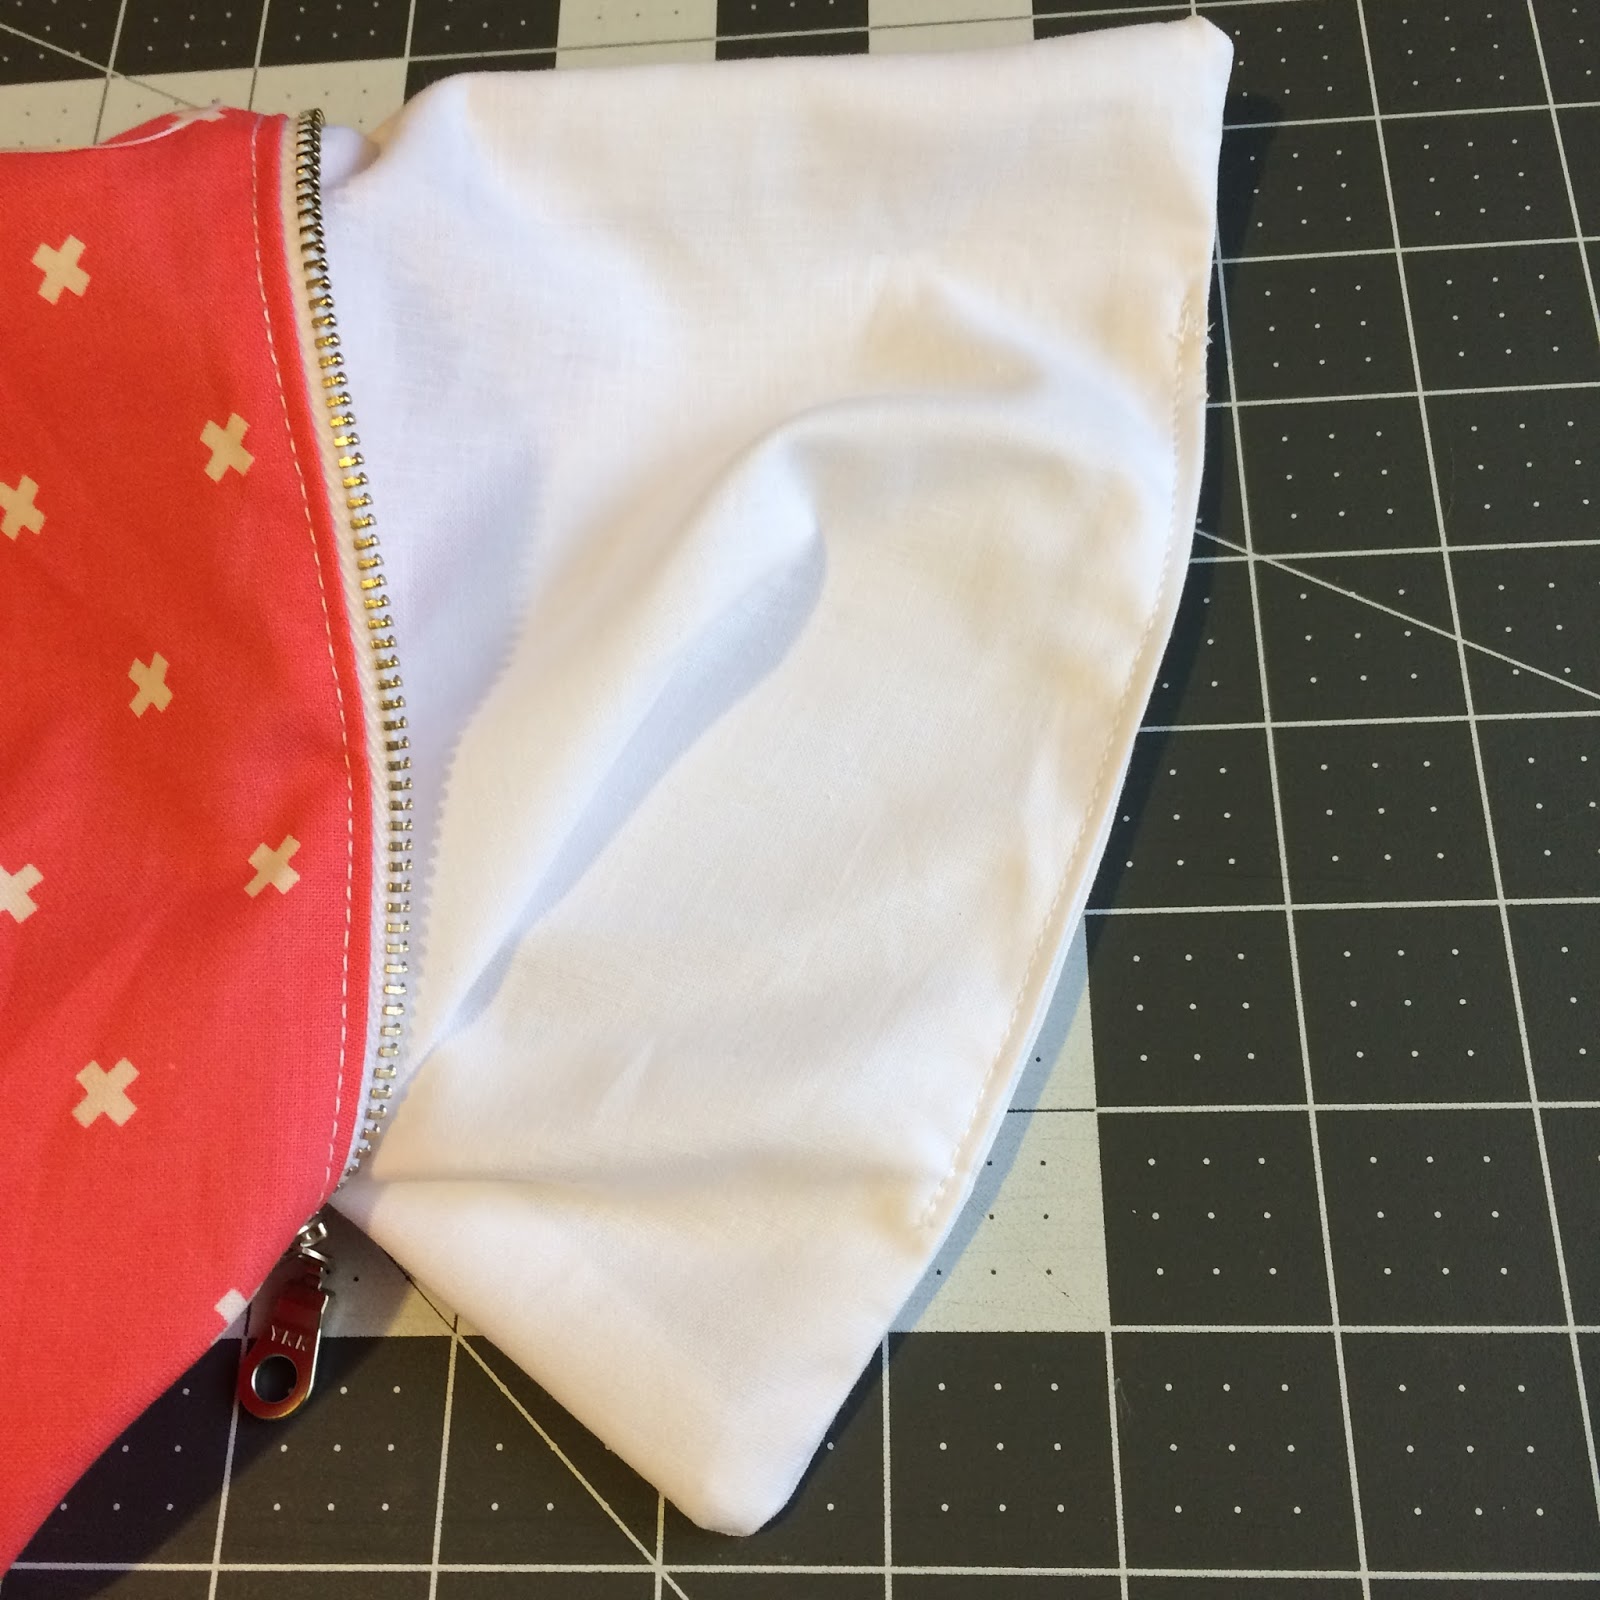
After you topstitch both sides, it should look like this:


It will look nice and neat on the inside, too!


Don't miss this step: OPEN your zipper about half way before pinning the lining and the outside pieces together!


Now pin the inside & outside pieces together.


When you get to the zipper (this is where I like to start pinning), make sure the zipper folds in towards the lining.


Now sew 1/4" seam allowance around the edges. Go slow at the zippers.

Leave at least 3-4" open in the lining so you can flip it right side out!


Now flip it right side out! Poke out all the corners.


Fold in the edges in the lining, place a pin to hold it together, and bring it to the machine to stitch the hole closed.


Now stick the lining back inside, smooth it out, and you're done!


What would YOU use it for? I would love to hear about it in the comments!


Friday, December 18, 2015

DIY Gift Tutorials for the Beginner Sewist

If you're like me, then you've got a pile of gifts to make before Christmas and not much time to waste, so let's cut to the chase and get started already!


Here are some of my favorite tutorials for sewing projects for beginner sewers. You're going to love these! Just click on the name to find a great tutorial!

1. The Lined Zipper Pouch by Dana : My favorite project to make for gifts this year has been this zipper pouch! The video is a must watch. She does an EXCELLENT job explaining each step and they turn out great!! Use them for anything you'd like! Fill them with candy, small knick knacks, nail polish... you get the point.


2. Business Card Holder by the Crafty Cupboard : Though the zipper pouch can be gifted to anyone (let your fabric imagination run wild), I decided to go for some super duper easy business card holders for the guys! (I even made mine super simple by omitting the batting and button!)


3. Dish-Drying Mat by Sewplicity : Do you have any extra towels laying around? A dish-drying mat would be a wonderful gift!


4. Burp Cloth by Make it Cozee : If these all seem a little too complicated (and you have a new mama to gift to), try this super duper easy and cute burp cloth tutorial!


5. The One Hour Basket by Hearts and Bees : This is a really fun project to do! My first few times took a little over an hour, but it really is that quick once you get the hang of it! It is a great way to pack up a gift basket!


Now it's time to get back to sewing! 

What are YOUR favorite gifts to sew?? I would LOVE to see more great tutorials out there! Ready, set, SHARE!!